How To Change Lock Screen Clock Style On Android (Samsung Galaxy)
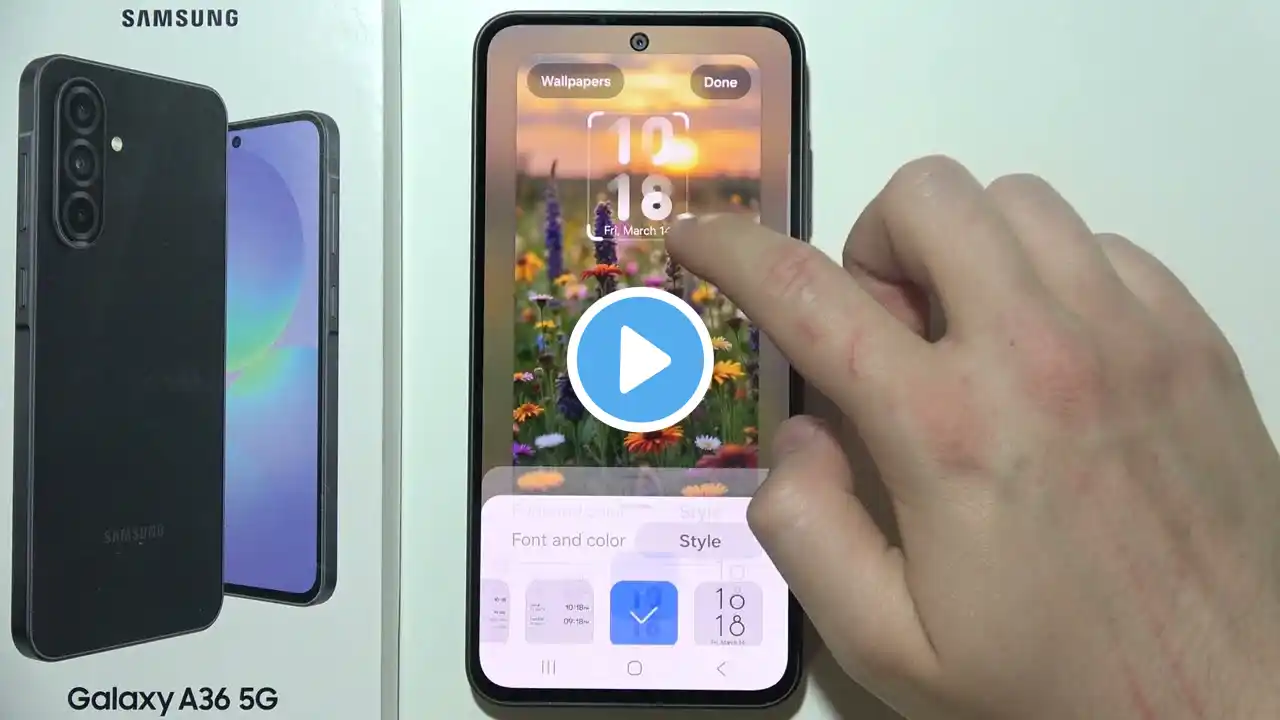
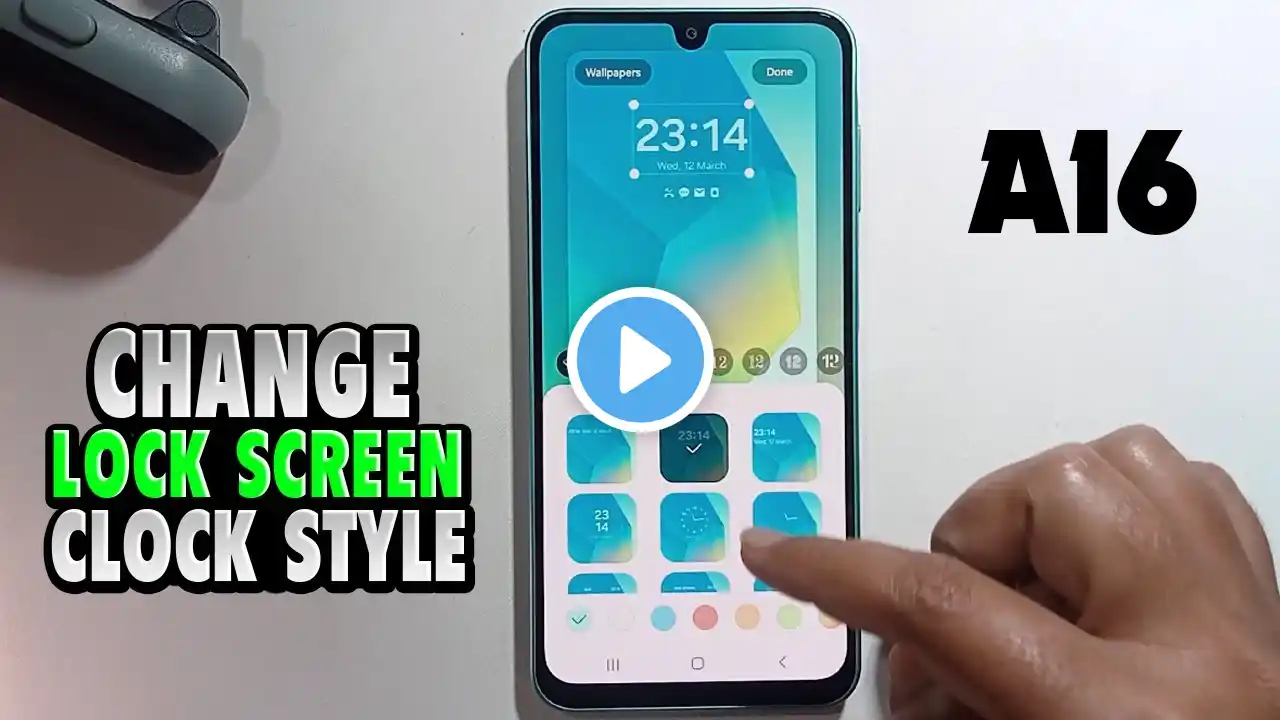
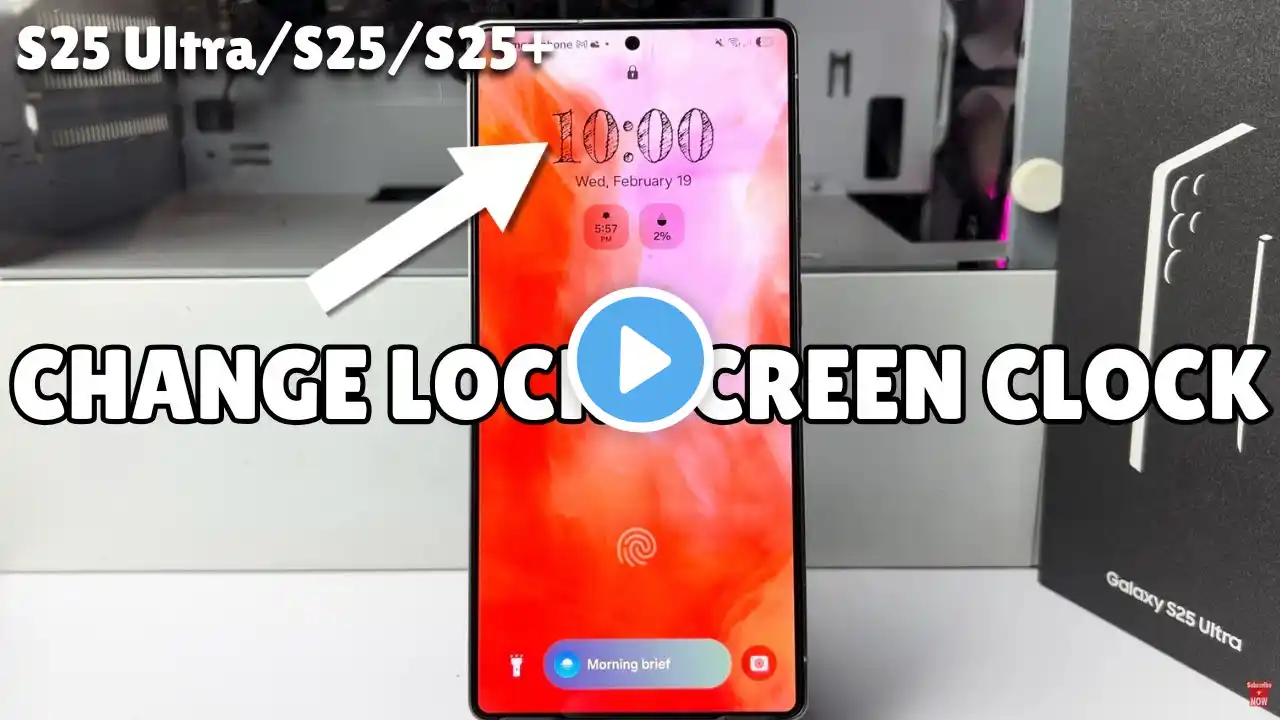
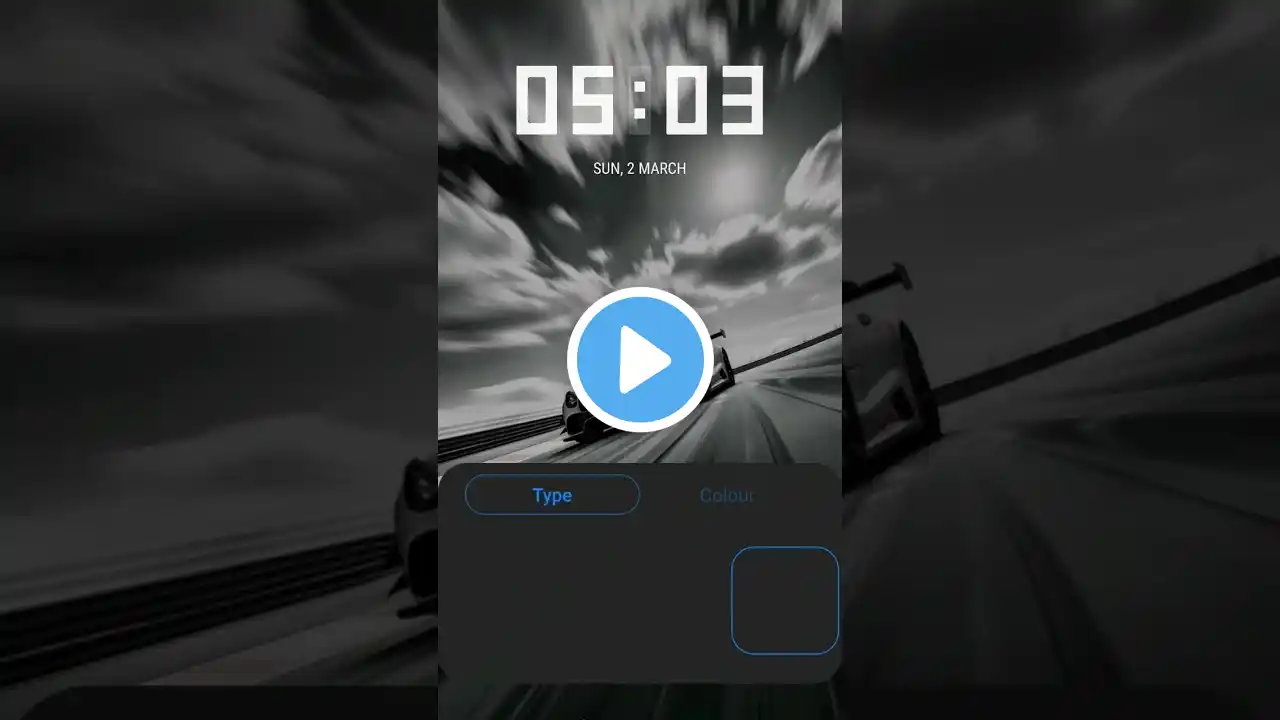
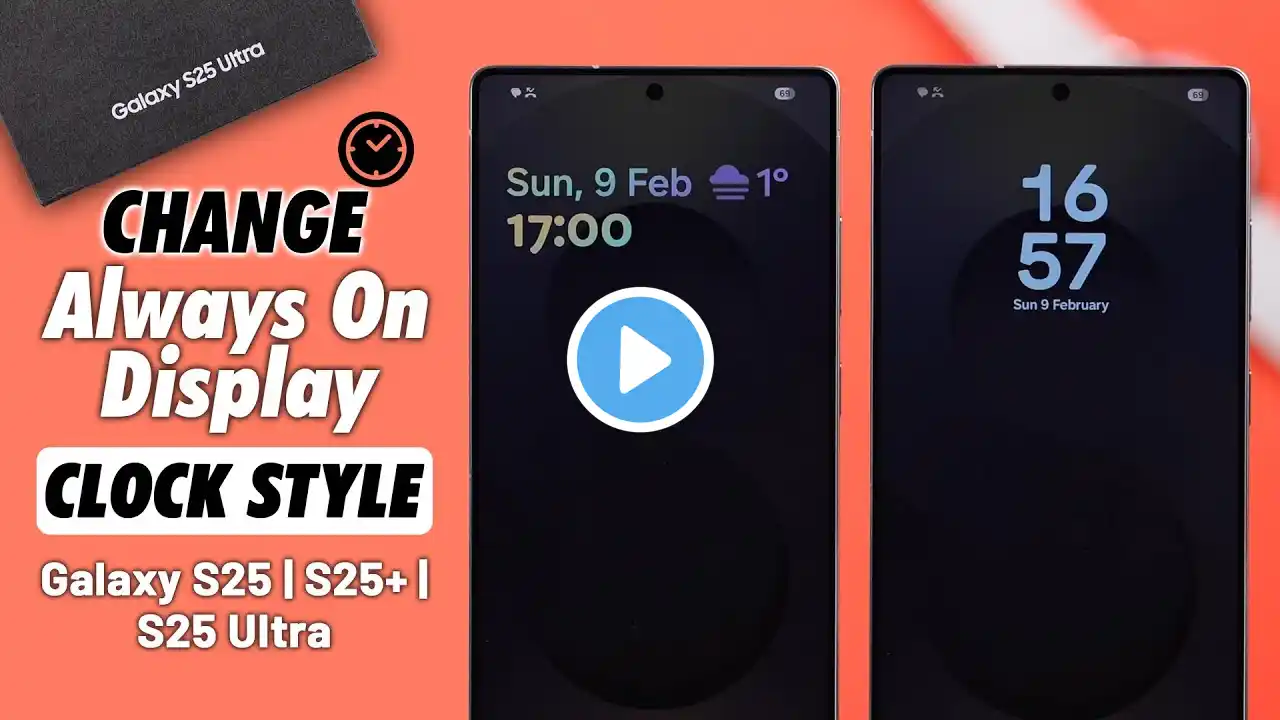
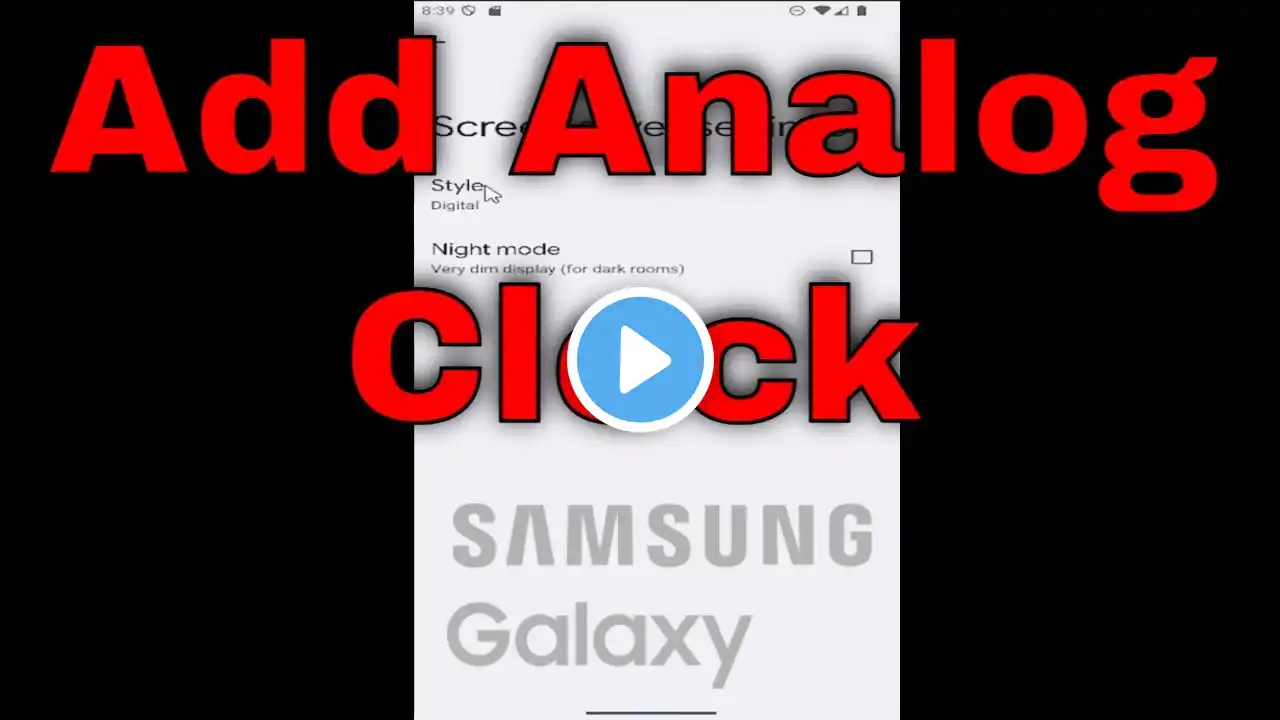
In this tutorial, we'll walk you through the step-by-step process of changing the lock screen clock style on your Android phone or tablet. Customize your Android device's lock screen clock. Read: https://www.webproeducation.org/how-t... Whether you want to personalize the clock's appearance, change its font, or tweak its design, we've got you covered. Discover various methods and settings available on different Android devices that allow you to modify the lock screen clock according to your preferences. Change Lock Screen Clock Style On Android: Step 1: Swipe down from the top of the screen to reveal the notification shade. Tap on the gear-shaped icon in the upper-right corner to access the settings or simply tap on settings from the app drawer. Step 2: Scroll through the settings menu and locate the "Lock screen" option. Tap on it. Look for "Always On Display" and tap on it to access its settings. Make sure Always on Display is ON. Step 3: In the Always On Display settings, locate the "Clock style" option and tap on it. You'll be presented with a variety of clock styles to choose from. Scroll through the options to find the one that resonates with you. You will get a closer look at each style, via the preview image at the top, to see how they appear on your screen. Step 4: After selecting a clock style, you may have the option to further customize it. This could include choosing between different colors, formats, or even additional design elements (including image clock). Experiment with the available customization options to create a clock style that suits your preferences. Step 5: Once you're satisfied with your clock style and any customizations you've made, locate the "Done" button. It is located at the bottom of the customization menu. Tap on this button to apply your changes. Step 6: Now, lock your device to view the updated lock screen with the newly selected clock style. Admire the fresh appearance and enjoy the personalized touch you've added to your Android device. Google Pixel 8 Pro: https://amzn.to/40c4wiG Anker USB - C Chargers: https://amzn.to/3Pfx1rV USB-C to 3.5mm Headphone Jack Adapter: https://amzn.to/3pNoCOY USB 3.1 to Type C OTG Adapter: https://amzn.to/3NS9Gc7 Anker USB C Hub, 555 USB-C Hub (8-in-1): https://amzn.to/3WK0o66 WOTOBEUS USB-C to USB-C Cable 5A PD100W Cord LED Display: https://amzn.to/3R6IU2b #pixel8 #googlepixel8 #Pixel8Launch #pixel8pro #googlepixel8pro #googlepixel #pixel #pixel8prolaunch #tutorial #tutorials #pixeltips #webproeducation #techtutorial #techtutorials #Pixel8Tutorials #techtips #techtipsandtricks ----My Gear for YouTube videos---- Main Camera (iPhone 13 pro): https://amzn.to/3GZztve Tripod: https://amzn.to/35acqRa Cell Phone Tripod Adapter: https://amzn.to/3v3wFuI Lights: https://amzn.to/3vkoGK7 As full disclosure, I use affiliate links on this channel and purchasing through these links earns me a small commission. The price you pay will be the same! Website: https://www.webproeducation.org Facebook: / webproeducation.org Twitter: / webpro_e Instagram: / webproeducation