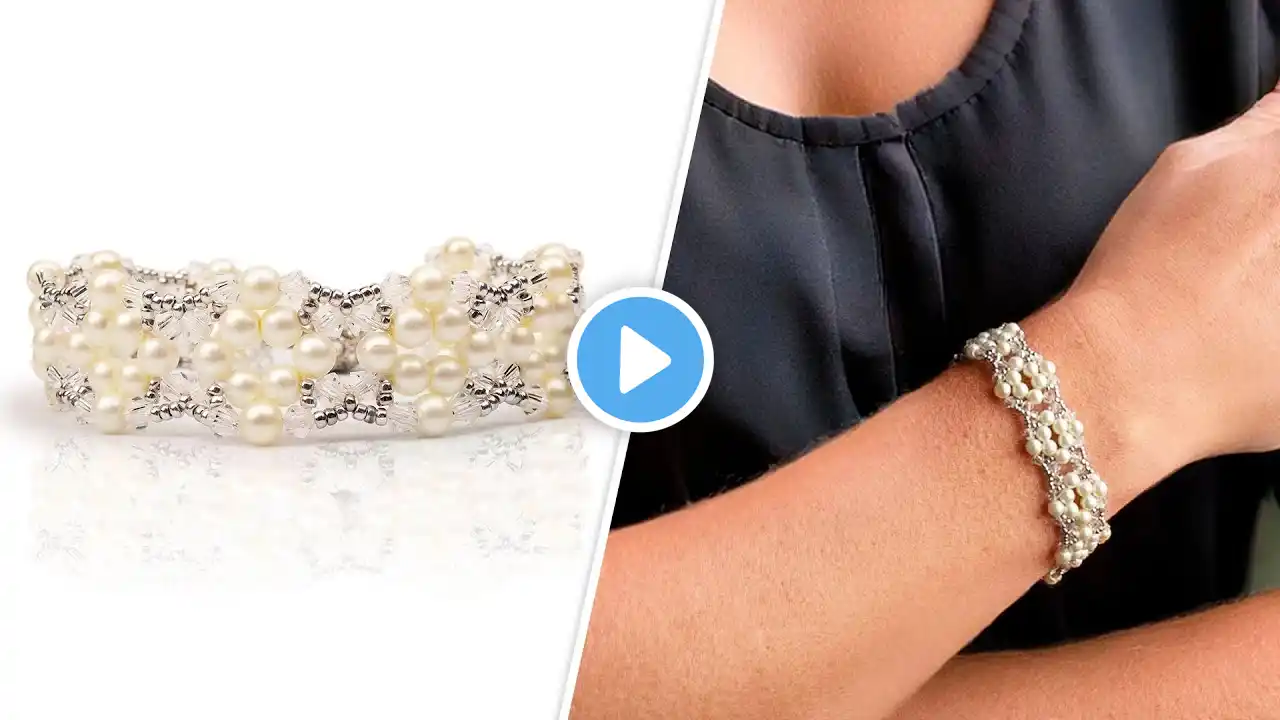
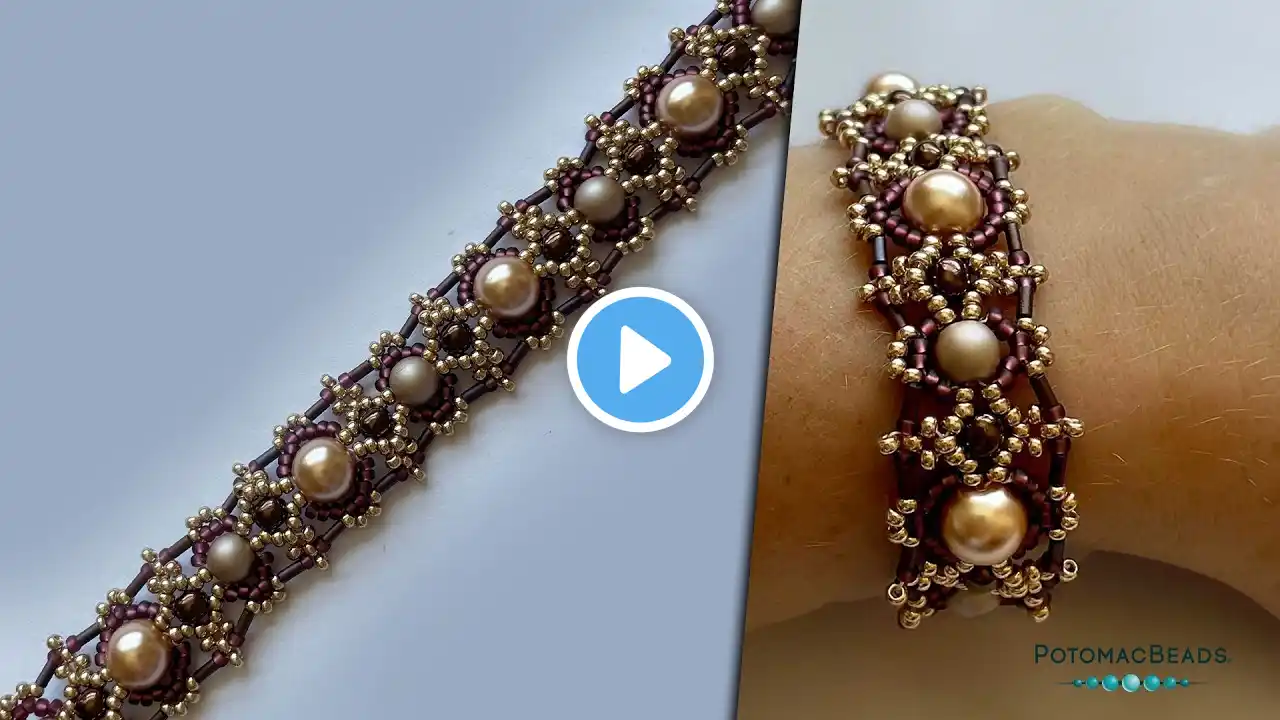
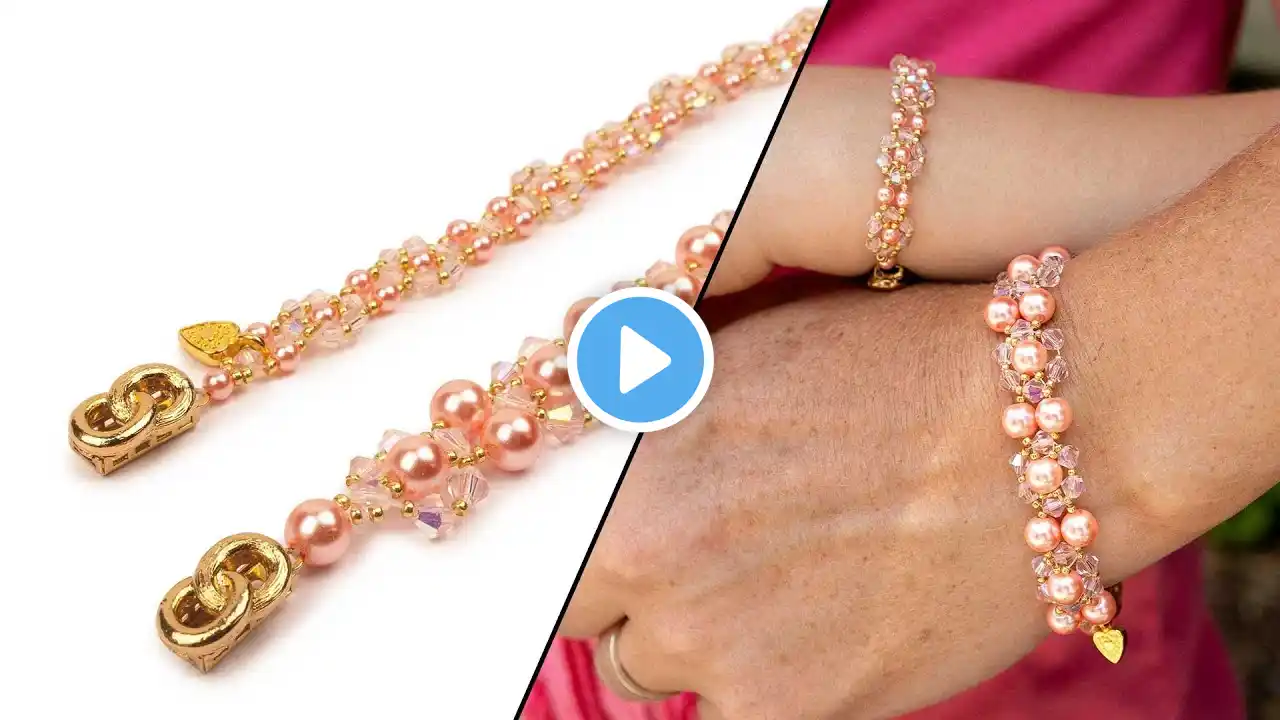
Pearl Weave Bracelet - DIY Jewelry Making Tutorial by PotomacBeads
Create a beautiful pearl weave bracelet using pearls, crystals, and seed beads in this step-by-step tutorial. Learn how to make a lacy right-angle weave design for a bracelet or necklace. Use 6mm pearls, 4mm bicones, Miyuki 11/0 and 15/0 seed beads in two colors, Dragon Thread, and a two-strand clasp to craft this elegant project. Click here for complete bead & jewelry-making supply lists: ➡️ https://www.potomacbeads.com/how-to/p... Master right-angle weave (RAW), creating fringe, and securing a clasp for a professional finish. Customize your design by experimenting with bead sizes, colors, or using alternative clasps for a personalized touch. The designer's suggested colors & materials: • Potomac Pearls - Light Amethyst 6mm, 39 Beads. • Potomac Crystal Bicone Beads - Amethyst AB2x 4mm, 39 Beads. • Toho Seed Beads - Metallic Amethyst Gunmetal 11/0, ~1 Gram. • Miyuki Seed Beads - Duracoat Galvanized Gold 11/0, ~2 Grams. • Miyuki Seed Beads - Galvanized Gold 15/0, ~2 Grams. • Claspgarten Crystal Primrose Flower Box Push Clasp | 10mm | 2-Strands | Real 23k Gold Plated, 1 Piece. Enjoy using this jewelry-making bead tutorial video to help you become a more creative and happier beader! 00:00:08 - Introduction: Overview of materials and project inspiration. 00:00:38 - Preparing the Materials: Gathering pearls, crystals, seed beads, and tools. 00:01:45 - Starting Right-Angle Weave: Creating the first unit with seed beads and crystals. 00:03:50 - Adding Pearls and Fringe: Attaching pearls with fringe detail. 00:05:30 - Continuing the Pattern: Repeating right-angle weave for bracelet length. 00:07:15 - Securing the Clasp: Adding and reinforcing the clasp. 00:08:50 - Adjusting Tension: Ensuring symmetry and tightening the design. 00:09:45 - Final Review: Demonstrating the finished bracelet as a necklace alternative.